Concrete Slab Lifting vs. Slab Replacement: Which Is Better for Sunken Concrete?

Last updated: September 10, 2026
Key Takeaways
- The opening holes are small, usually around 5/8 inch to 2 inches, so the repair footprint stays limited.
- A new slab may be walkable in about a day or two, but full strength develops over roughly 28 days for standard concrete.
- Standard concrete reaches usable strength gradually; a contractor may allow light foot traffic sooner than vehicle traffic, but full cure still takes about 28 days.
- A lift of 1/2 inch to 2 inches is a common kind of correction on settled walkways and driveways, though larger adjustments can be possible.
Concrete slab lifting is usually the better fix for a sunken sidewalk, driveway panel, patio, or garage approach when the slab is still structurally sound. Slab replacement is the better choice when the concrete is broken apart, badly eroded underneath, or already beyond a clean lift. The right answer is usually not “which is cheaper,” but “which one restores level ground without buying a bigger problem later.”
Who this applies to, and what I’m assuming
This applies to homeowners, property managers, and small business owners looking at settled concrete around a home or building: a 4-inch driveway slab, a front walk, a patio, a stoop landing, or a garage apron. I’m assuming the slab is sunken, tilted, or creating a trip edge, but not collapsed into a sinkhole. I’m also assuming you want to decide whether to call for lifting or replacement, not to become a concrete contractor yourself.
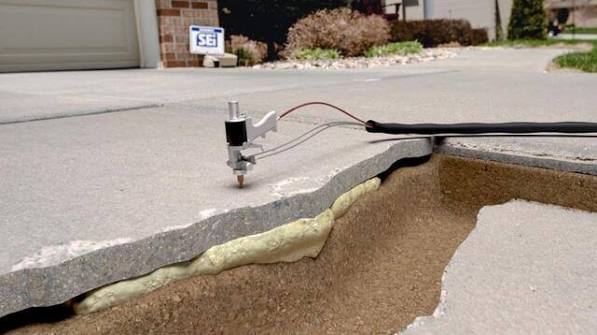
Slab lifting means raising the existing slab back toward its original elevation. The most common methods are mudjacking, which pumps a cementitious slurry under the slab, and polyurethane foam lifting, which injects expanding foam through small holes. Slab replacement means breaking out the old concrete, fixing the base, and pouring new concrete.
For a typical accessible panel, slab lifting often costs less and takes less time than replacement, sometimes by a wide margin, but price depends on area size, access, thickness, and how much base repair is needed. Replacement is the better choice when the slab has major cracking, edges are crumbling, or the soil has washed away enough that the slab has lost support.
I would not treat either option as automatic if the settlement is active, the ground is still moving, or the concrete is part of a structural element such as a foundation wall, column footing, or slab tied into a load-bearing system. Those cases need a contractor who understands the cause of movement, not just the symptom.
What usually causes sunken concrete in the first place
Sunken concrete is usually a support problem, not a concrete problem. The slab itself may still be strong; the soil below it has changed. Common causes include poorly compacted fill, erosion from downspouts or surface water, clay soil shrinking in dry weather, frost heave followed by thaw settlement, and voids left by plumbing leaks or decayed organic material.
That distinction matters because lifting only works if the slab still has enough integrity to be repositioned. A 4-inch residential slab can often be raised if the concrete is mostly intact and the base has not been destroyed. If the slab has multiple full-depth cracks, broken corners, or severe scaling, lifting can leave you with a level but visibly damaged surface.
Replacement makes more sense when the base has failed so badly that the slab would just settle again, or when the slab is already too fragmented to move as one piece. I also get cautious when the sinking is uneven over a long run, like a 20-foot sidewalk section, because that can signal a broader drainage or soil issue that should be corrected before any concrete work.
In freeze-thaw climates, especially where snowmelt and spring runoff hit the same area every year, I pay close attention to drainage. If the water source is not fixed, both lifting and replacement can become temporary. That is why a good contractor will talk about gutters, grading, and downspout discharge before talking about holes or new concrete.
Concrete slab lifting vs. slab replacement: how the two fixes really differ
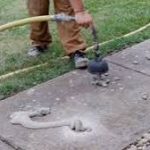
Concrete slab lifting is usually the better first option when the slab is structurally sound and the settlement is moderate. The advantage is speed: many lifting jobs are completed in a few hours, and the surface can often be used the same day, depending on the method. The opening holes are small, usually around 5/8 inch to 2 inches, so the repair footprint stays limited.
Mudjacking uses a heavier slurry and can be useful where the slab needs firm support and the voids are not deep. Polyurethane lifting uses a lighter material and can sometimes work better where the base is softer or access is tight. I would treat both as repair methods, not magic fixes. If the slab is cracked through and moving independently in several pieces, lifting one piece may make the next crack more obvious.
Replacement is more disruptive but gives you a fresh start. The old slab comes out, the base can be regraded and compacted, and new control joints can be placed where they make sense. That matters because joints help control cracking by telling the slab where to break as it shrinks. A new pour also lets the contractor correct thickness problems, edge failures, and bad slope. For exterior flatwork, I usually want at least a slight fall away from the structure so water does not sit at the edge.
The downside is time and collateral disturbance. Replacement usually involves demolition, haul-away, forms, base prep, pouring, and cure time. A new slab may be walkable in about a day or two, but full strength develops over roughly 28 days for standard concrete. If the area is a driveway or entry route, that downtime matters.
There is also a visual difference. A lift can leave small injection holes and a repaired seam line where the slab moved. A replacement gives you new finish texture but may not match adjacent older concrete in color or appearance. If the rest of the area is old and uneven, replacing one panel can make the neighboring slabs look worse by comparison.
How do I know if lifting is enough?
Lifting is enough when the slab is in one piece, the settlement is fairly uniform, and the underlying cause can be corrected or is at least not actively worsening. I look for a slab that has a clean tilt instead of shattered edges, no severe differential cracking, and no sign that the concrete has lost thickness from bottom-side erosion.
A contractor will usually assess the slab thickness, the size of the voids, and the amount of rise needed. A lift of 1/2 inch to 2 inches is a common kind of correction on settled walkways and driveways, though larger adjustments can be possible. If the slab needs to come up several inches and the surrounding joints are already stressed, I would want a careful plan for incremental lifting rather than one aggressive push.
The ground condition matters too. If the slab sits over wet clay, poorly compacted fill, or a washout from a downspout, the base may need stabilization first. Otherwise the repair can look fine for a while and then settle again. I want to know where water goes during a storm, where snow melts, and whether downspout extensions move discharge 6 to 10 feet away from the slab or just dump it nearby.
What I consider a warning sign is a slab that rocks when stepped on, sinks at one corner while the rest remains high, or sounds hollow over a large area. That can mean the support is missing over a broader zone, not just a small pocket. In that case, lifting may still be possible, but it should be approached with caution and with clear expectations that the slab’s future depends on the base being stabilized.
How is a sunken slab lifted, step by step?
A proper lift starts with finding the cause, drilling the right holes, and raising the slab gradually while checking slope and crack behavior at every stage.
- Map the settlement pattern. Mark the low points with a chalk line or tape and measure the drop with a 4-foot level or laser. Verify the amount of slope from one edge to the other; a problem is a slab that varies enough to create a trip edge or reverse drainage.
- Check the slab condition. Look for full-depth cracks, missing corners, spalled edges, and areas that move independently when pressed. Verify the slab is one liftable piece; a problem is breakage that already separates the panel into unstable sections.
- Inspect the base and water sources. Look for downspouts, negative grading, soft spots, and erosion at joints. Verify where water goes in a 1-inch rain; a problem is active runoff under the slab or repeated saturation at the same edge.
- Choose the lift method. Mudjacking or polyurethane foam is selected based on void size, access, and the need for weight versus precision. Verify the contractor can explain why that method fits this slab; a problem is a one-size-fits-all pitch.
- Drill injection holes. Holes are usually placed in a pattern that reaches the voids without shattering the slab, often near low points and along the centerline. Verify the spacing is controlled and the slab edges are protected; a problem is over-drilling or drilling too close to a weak edge.
- Lift in small increments. Material is pumped slowly while the slab is watched for movement, sometimes in 1/4-inch or smaller steps. Verify the slab rises evenly and does not bow; a problem is one corner lifting before the rest, which can open cracks.
- Check finished grade and drainage. After the lift, confirm the surface drains away from the house or path and does not create a new ponding point. Verify with a level or water test; a problem is a slab that looks higher but traps water against the structure.
- Patch holes and monitor settlement. The injection points are filled and the area is checked again after rain and seasonal temperature change. Verify the repair holds through at least one wet cycle; a problem is renewed dropping, which means the base issue was not corrected.
A good lift is not just “higher.” It is level, stable, and draining the right way. Bad lifting leaves the slab cosmetically raised but still riding on weak soil.
When should I replace the slab instead of lifting it?
Replace the slab when the concrete is too damaged to move cleanly, the support failure is severe, or the repair would only delay the same problem. A lifted slab with deep structural damage is a bandage, not a fix.
Full-depth cracks running across the panel: The slab is no longer behaving as one unit — replace it, because lifting can widen the crack or make one side float above the other.
Edges that have broken away or crumbled badly: The slab has lost structural integrity at the perimeter — replace it, because the edge will continue to chip and spall after lifting.
Evidence of washout or soil loss under a large area: The base is missing, not just compressed — replace it only after correcting drainage and base compaction, because lifting over a void invites repeat settlement.
Multiple slabs have settled at different rates: The movement may be regional, not isolated — replace only the panels that are beyond salvage, and fix the drainage or soil problem first.
The concrete is very thin, patched, or already failed once: Thin or weak concrete can break during injection — replace it, because the risk of cracking during lift is too high.
The slab is tied into a structural condition: Steps, stoops, or slabs interacting with foundations, columns, or garage thresholds need more than cosmetic correction — get the design reviewed before choosing a fix.
When replacement is the right call, I want the contractor to talk about base preparation, compaction, joint layout, slab thickness, and cure time. A new slab should not just duplicate the old mistake. If the old concrete sank because water pooled beside it, the replacement should be graded and drained differently. If the old base was soft fill, it needs to be compacted in lifts, not dumped and smoothed.
What does it cost, what affects the price, and how long does it take?
Slab lifting is usually faster and cheaper than replacement, but the price depends on size, access, material, and how much prep the job needs. Small lifting jobs may be priced by the panel, the square foot, or by the project minimum. Replacement usually costs more because it includes demolition, disposal, base work, formwork, concrete delivery, and labor.
For lifting, the main cost drivers are the number of voids, the amount of rise needed, slab thickness, and whether the contractor can reach the area easily. A narrow backyard path with poor access can cost more than the same square footage at a driveway edge because equipment and material handling take longer. Polyurethane foam lifting is often chosen for precision and lighter weight; mudjacking can suit larger voids, but either method can be wrong if the base is unstable.
Replacement cost rises with demolition difficulty, haul-away distance, reinforcement needs, and finish requirements. A plain broom-finish sidewalk panel is simpler than a decorative patio with matching texture or colored concrete. If the slab abuts a garage, foundation, or fence line, cleanup and forming become more labor intensive.
Time is different too. A lifting job can often be done in part of a day, with use restored quickly. Replacement usually takes longer because demolition, subgrade work, pouring, and curing are separate phases. Standard concrete reaches usable strength gradually; a contractor may allow light foot traffic sooner than vehicle traffic, but full cure still takes about 28 days.
When I compare the two, I ask a simple question: if I spend money now, am I buying a repaired slab or a replacement slab? If the concrete is sound, lifting buys a lot. If the slab is already failing, replacement buys a longer-lived result.
The mistakes people actually make, and what they cost
The biggest mistake is choosing the cheapest quote without asking what problem it solves. That usually costs twice: once for the repair, and again when the slab moves or cracks again. A better alternative is to ask whether the contractor is addressing the base, drainage, and slab condition, not just the visible low spot.
Another mistake is lifting a slab before fixing the water source. If a downspout still dumps water beside the walk, the same void can form again. The fix is to extend drainage away from the area before or along with the repair.
People also accept a slab that is raised but still sloped the wrong way. That can send water back toward the house or leave a puddle at a doorway. The correct alternative is to verify slope with a level before the material sets or before the crew leaves.
A fourth mistake