Last updated: September 10, 2026
Key Takeaways
- A small sidewalk repair may take about 1 to 3 hours.
- A problem sign is a crew that leaves without showing what changed or what should be watched over the next 24 to 48 hours.
- A bad job usually shows up in the first 24 hours, not months later.
- If a section is down 1 1/2 inches, for example, ask whether the crew expects to recover all of it or only most of it.
A concrete leveling service appointment answers one blunt question: what happens from the first look at the slab to the last check before the truck pulls away? Usually, the crew inspects the concrete, figures out why it shifted, drills small injection holes, lifts it with grout or foam, patches those holes, then checks the finished height. Quick. Clean. Or at least that is the goal.
Got a driveway panel, sidewalk section, patio corner, or garage slab that has settled? Good. This article lays out what the appointment actually looks like and what decent work should resemble when it is finished.
Who this applies to, and what I am assuming you already know

Homeowners, property managers, and small business owners are the main audience here. Same issue, different property. I am assuming you already know the basic problem: one section sits lower than the rest, water may collect there, and a trip edge may have formed at a joint or crack.
I am also assuming you are not asking about decorative resurfacing, full slab replacement, or structural foundation repair. Concrete leveling is for slabs that are out of plane but still worth saving. Not everything is salvageable. If the concrete is crumbled through, broken into loose pieces, or sinking because the soil underneath is failing in a larger way, this is not the right fix. The visit may still happen, but the answer may be “this should be replaced,” not “this can be lifted.”
For a typical residential job, the visit is often measured in hours rather than days. A small sidewalk repair may take about 1 to 3 hours, while a larger driveway section can take longer, especially if the crew must move equipment, cut access around vehicles, or wait for a fill to cure; a local contractor can tell you what is realistic for your slab. Time depends on slab size, the number of voids underneath, and whether the material is polyurethane foam, cementitious grout, or a mudjacking mix. I would not assume the same process fits every property. Not even close.
Expansive clay, freeze-thaw cycles, and poor drainage change the picture. They shape how the slab moved in the first place.
What happens during a concrete leveling service appointment?
Inspect, measure, drill, fill, lift, patch, verify. That is the usual sequence. Materials and methods can change, but the order should not.
- Walk the slab and mark the problem area. The crew identifies settled corners, cracks, joints, and low spots, often using a straightedge, string line, or laser level. I would expect them to note the amount of settlement in inches, not just say it looks low. Verify that the lowest edge, any trip point, and nearby cracks are all included in the plan. A problem sign is vague marking with no explanation of where the slab will be lifted or why.
- Check access, drainage, and the cause of movement. A good appointment includes a quick look at downspouts, slope, soil washout, and any voids under the slab. In many jobs, the crew is trying to correct settlement caused by erosion or compaction loss, not just the visible dip. Verify that water from gutters, sprinklers, or grading will not keep undermining the same spot. No drainage talk? Red flag.
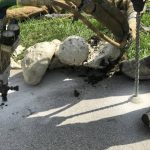
- Drill injection holes at the chosen pattern. Holes are usually drilled through the slab in a grid or along the affected edge. The hole size is typically about 3/8 inch to 5/8 inch for polyurethane foam work, while mudjacking ports can be larger. Verify that the holes are placed where they can actually move the slab, not randomly in the middle of sound concrete. A problem sign is excessive cracking around the hole or drilling so close to a joint that the edge may split.
- Inject the leveling material in controlled passes. The crew pumps grout or foam beneath the slab in short bursts. Polyurethane expands quickly; cementitious grout flows and builds more slowly. The right method depends on slab weight, void size, and how much lift is needed. Verify that the slab rises in small increments, usually fractions of an inch at a time, rather than all at once. If one corner jumps too fast, the slab can crack or tilt the wrong way.
- Watch for lift, not just material use. Filling the void is only half the job. The crew should check level as the slab moves, often with the eye, a laser, or a straightedge. Verify that adjacent joints close evenly and that the high side does not start to hump. A problem sign is a visible step forming where the slab should meet the next panel.
- Stop when the slab reaches the target grade. Most leveling work aims to reduce the trip hazard and improve drainage, not force a perfect factory-flat plane. In many cases, a small cosmetic offset of less than 1/4 inch may remain because the slab has a crack, a fixed adjoining panel, or a limited safe lift. Verify that water will shed away from the building and that doors, thresholds, or garage edges still clear. Pushing a cracked slab higher than it can safely go is asking for trouble.
- Patch the holes and clean the surface. The injection points are plugged with matching cement or material-specific filler. Some residue may remain, especially with polyurethane foam, and a local contractor can explain what cleanup is normal for that system and what should be removed. Verify that patching does not leave sharp edges or open voids. A problem sign is loose patch material or unsealed holes that let water in.
- Confirm the result and explain curing time. The crew should recheck level, walk the slab, and tell you when it can be loaded. Polyurethane systems often allow faster return to service than mudjacking, but the exact timing still depends on product and weather, so ask the crew to give the specific window for your job. Verify the time window for walking, driving, or replacing heavy objects. A problem sign is a crew that leaves without showing what changed or what should be watched over the next 24 to 48 hours.
The most useful thing to understand is that the appointment is partly repair and partly diagnosis. One-time void? Leveling may be a clean fix. Soil still moving? The same issue can come back. That is why the inspection matters as much as the injection.
How much does concrete leveling usually cost, and what changes the price?

Concrete leveling usually costs less than tearing out and replacing a slab, but the price depends more on access and lift complexity than on square footage alone. Contractors may quote by the job, by the linear foot, or by the area, then adjust for material volume, slab thickness, and travel. If you hear a price that sounds flat for every case, ask what it includes.
Several things change the cost. A narrow sidewalk panel is simpler than a long driveway apron. A slab with many voids takes more fill. A panel that needs a modest lift is easier than one that has dropped several inches and may already be cracked under stress. Soil type matters too: expansive clay, poorly compacted fill, and erosion-prone grades often mean the repair needs more material or more careful staging. In colder climates, freeze-thaw cycles can create repeat settlement near edges and joints, which may make the problem more extensive than the visible dip suggests.
Material choice also affects price. Polyurethane foam injection usually uses smaller holes and can cure faster, which is useful when downtime matters, but a contractor can tell you whether the speed is worth the cost for your slab. Mudjacking or cementitious slurry can be appropriate for some larger voids and heavier slabs, but it involves more material and often larger ports. Neither method is magic. There is always a trade-off. Foam is light and fast, but not every contractor or slab condition is a fit. Mudjacking can be more forgiving in certain repairs, but it is not the right answer for every site.
A quote should also reflect site obstacles. Parking a truck at the curb is easier than carrying hoses through a fenced yard. Tight side yards, landscaping, retaining walls, and overhead clearance can slow the work. If your slab is attached to a garage, porch, or stairs, the crew may need to protect adjacent finishes or limit how far they can safely raise the concrete.
A good estimate should tell you what is included: drilling, lift, patching, cleanup, and any warranty terms. It should also say what is not included, such as crack stitching, sealant, or full replacement of broken sections. If the answer is only “we’ll level it,” that is too thin to compare.
What should I ask before I book the appointment?
Ask enough to see how the crew diagnoses the problem, how they plan the lift, and what happens if the concrete will not take a safe rise. That is the line between a repair and a gamble.
I would ask these questions in plain language:
-
How will you decide whether this slab can be leveled or should be replaced?
A serious contractor should talk about cracking, extent of settlement, soil conditions, and voids. If the answer is just “yes, no problem,” that tells you little. -
What material will you use, and why?
Ask whether the job uses polyurethane foam, mudjacking slurry, or another fill. The most useful answer names the reason for the choice, not just the product. -
How much lift do you expect, and what is the limit?
A real estimate usually gives a target in inches or fractions of an inch. If a section is down 1 1/2 inches, for example, ask whether the crew expects to recover all of it or only most of it. -
How do you confirm level during the job?
I want to hear about a laser level, straightedge, or another actual method. If the answer is “by eye,” that is weak on anything more than a tiny cosmetic fix. -
What happens if the slab cracks while it is being lifted?
This question matters because some slabs are too brittle or already too stressed. The contractor should tell you how they manage that risk. -
How soon can I use the surface again?
For a driveway, the timing matters. For a walkway, the answer may be sooner. Ask for the actual return-to-service window, not a vague “later.”
A useful appointment starts before the truck arrives. Move vehicles, clear patio furniture, and make sure the crew can reach the slab edge. If you have sprinkler heads, drain lines, or buried lighting near the work area, say so. Hidden utilities are a real issue, and a poor setup can slow the job or create damage.
What does a bad concrete leveling job look like?
A bad job usually shows up in the first 24 hours, not months later. The clearest sign is a slab that is still visibly out of grade, so water collects in the same low spot after the repair. Another sign is a high edge that became a ridge, creating a new trip point instead of removing the old one. If the lift went too far, the repair may have traded one problem for another.
Watch for patch holes that are not sealed, powdery residue left all over the slab, or lifted sections that sound hollow because material was not distributed properly. In some cases, the concrete may crack wider during injection. A few hairline cracks are common in old concrete, but a fresh diagonal break through the panel tells me the lift was too aggressive or the slab was already too weak for the method used.
The worst jobs ignore drainage. If downspouts still empty beside the slab, or the grade still slopes toward the foundation, the same settlement can return. I would also be cautious if the crew never checked the surrounding panels. A low driveway apron can affect the garage lip, and a sidewalk panel can create a step at the adjacent joint. Leveling one piece without checking the relationship to the next one is how bad transitions happen.
The fix for a poor job depends on the cause. Sometimes the slab can be adjusted again. Sometimes the right answer is to stop adding material and review drainage or replacement. A contractor who explains those limits is more useful than one who promises a perfect slab every time.
When does the standard approach need to change?
The standard approach needs to change when the slab, the soil, or the site makes a simple lift unsafe or pointless. That is not a failure of the method; it is the method telling you where it stops.
Deep, repeated settlement in the same area: The soil is still moving or washing out — leveling alone may only be temporary, so drainage correction or replacement should be discussed.
Concrete broken into multiple loose pieces: The slab is no longer acting as one unit — patching and lifting can worsen the break, so replacement is usually the better route.
Active water intrusion under the slab: A leak, poor gutter discharge, or surface runoff is still feeding the void — the cause should be corrected before or with the repair, or the problem will likely return.
Frozen ground or saturated soil on the day of service: Soil response becomes unreliable — the appointment may need to be rescheduled because lift behavior can change under those conditions.
Very thin or fragile concrete at the edge: The panel may not tolerate a normal lift — the crew may need to reduce lift expectations or avoid that section entirely.
Structural movement at the foundation rather than the slab: The slab may not be the real problem — leveling the concrete will not fix a settling wall or footing, so the issue needs a different remedy.
Freeze-thaw climates need extra attention at joints, downspouts, garage aprons, and sidewalks. Clay-heavy regions are no kinder. Moisture changes can create seasonal movement, so a one-time correction may need follow-up grading or drainage work. Those details are not decoration; they decide whether the repair lasts.
How long does the appointment take, and what should the result look like?
A typical concrete leveling appointment often takes 1 to 4 hours for a residential job, though larger or more complex slabs can take longer. The result should look ordinary, not dramatic: the slab should be closer to level, the surface should remain intact, and the change should make walking or driving feel safer. In practical terms, the concrete leveling service appointment should leave you with a clear explanation of what was lifted, how much was moved, and what you need to watch over the next day or two.
For a sidewalk, that might mean a smoother step from one panel to the next. For a driveway, it may mean better tire transition and less pooling near the garage. For a patio, it may mean furniture sits without rocking and water no longer settles at the low edge. I would not expect perfection on old concrete, especially if cracks or adjoining panels limit how much can safely move, but I would expect a noticeable improvement that matches the estimate.
The best concrete leveling service appointment is the one where the crew shows you the before-and-after condition, explains any remaining limits, and leaves the area clean enough that you can tell the work was completed. If that did not happen, the job may have been fast, but it was not finished well.
How concrete leveling compares with replacement
Concrete leveling is usually the better option when the slab is intact but uneven. Replacement is usually better when the slab is broken apart, structurally compromised, or too damaged to move safely. A concrete leveling service appointment should make that distinction clear early, because the right fix depends on whether the problem is settlement, cracking, or a larger structural issue.
The practical difference is time and disruption. Leveling is often a same-day service, while replacement can involve demolition, haul-off, forming, curing, and a longer return-to-use window. Leveling also keeps the existing slab in place, which can be helpful near landscaping, steps, fences, or tight property lines. Replacement, by contrast, gives you a fresh surface and a chance to correct shape or drainage more completely.
For more background on settlement causes and why drainage matters, see the U.S. Environmental Protection Agency’s guidance on managing stormwater runoff and the U.S. Department of Housing and Urban Development’s advice on grading and drainage around homes. For a local service comparison, many contractors also explain how a concrete leveling service appointment differs from full replacement on their service pages, such as our concrete leveling service overview, slab repair, and driveway repair.
What to do after the crew leaves
After the crew leaves, keep an eye on the slab during the first 24 to 48 hours. Small surface dust, patch color differences, and minor residue can be normal, but new pooling, fresh cracking, or a return of the same trip edge are signs to call back quickly. If the contractor gave you a curing window, follow it before driving on the slab or placing heavy items back in the area.
It also helps to watch the water path after the next rain. A successful concrete leveling service appointment should not just make the slab look better; it should help the surface shed water in a way that makes sense for the site. If water still runs toward the same spot, the underlying drainage issue may need attention.
When the job was done well, the concrete leveling service appointment will feel uneventful afterward. That is the goal: a shorter trip hazard, a cleaner transition, and a slab that behaves more like the surrounding concrete.
Sources
- U.S. Environmental Protection Agency, stormwater and runoff guidance: https://www.epa.gov/soakuptherain
- U.S. Department of Housing and Urban Development, home drainage and grading guidance: https://www.hud.gov/program_offices/comm_planning/cpd/environment/review/grading